Showing posts with label DIY. Show all posts

Wednesday, 10 December 2014

Beard Grooming Tips for hipster beards and lil' beardspo!

Schick Hydro 5 Groomer $21.99 available from www.priceline.com.au

Your boyfriend is probs trying to grow one, Kei$a has name dropped them, the Batista's and bar tenders at your local have definitely got them, you simply could not have noticed one of the biggest trends in 2014 : MEN WITH BEARDS!
Men with beards have gone from being a very 80's dad look to the height of on-trend male grooming! It is highly contagious - from tradies to suits, the beard has crossed all boundaries to be an acceptable form of face accessory for dudes.
This is a beauty blog and I know that the majority of readers are ladies so I am going to focus on the grooming the wild beard in the post. I've been on the receiving end of a make out session with a bearded man many a time (side note: I am going to now count these make out sessions as research)
and careful grooming and tidying of any beard is needed to ensure your make out partner doesn't suffer from dreaded pash rash....eewwww.

Top Tips for a well groomed beard:
1. Trim and shape the beard under the jawline down the neck and up onto the cheeks, the Schick Hydro Groomer is great, trim the hair first and then shaves for a clean look. 
2. Once a month take a visit to your local barber and have him shape your beard, so you have a line to follow when trimming and maintaining at home.
3. Growing a beard is like growing out a fringe/bangs, there is going to be an awkward stage you just have to grit your teeth and wait it out.
4. Beard Oil, there are lots on the market these days but if your bearded boyf isn't one for products you can always used a bit of your hair oil on his beard.
5. Wash your beard! Wash it twice a day! No woman wants to kiss a beard with the kebab you had for lunch still stuck in it at 7pm at night, its just plain gross.

And now for a little 'Beardspo'........ Ahhhhhhhhhhhhh


xx Nella
Twitter @beautegazette
Instagram @beautegazette
Google +  +Nella van veenendaal 
Bloglovin' HERE

Tuesday, 27 May 2014

D.I.Y: How to easily remove Gel or Shellac nail polish at home!

Are you an obsessive polish picker? Me too! Picking off Gel or Shellac polish is one of the most damaging things you can do to your poor defenseless nails. But once I've got one little chip in my polish then I just can't stop picking and having to waiting to get to a salon to have it removed by a professional will drive me crazy. So removing at home is the only way I will save my nails from being picked to death. Here are my full proof removal steps for Gel and Shellac polish:
-Scissors
-Acetone (found at beauty supply stores or buy online)
-Aluminium foil
-Cotton rounds
-Nail file and buffer
-Glass jar (I used an old candle jar)

Time to PREP!Cut up 10 Aluminium foil into 15cm x 10cm pieces and cotton rounds into triangles, doing this will save you faffing about and mess.
1. No matter how grown out do not attempt to pick and peel off Gel or Shellac, you will ruin your nails!
2. Using a coarse nail file, file off the topcoat layer of the polish. Making the surface of your nails is rough to the touch. This allows the acetone to break down the Gel or Shellac polish more easily. 
3. Place cotton triangles into the glass jar and add 30mls of Acetone, pop an acetone soaked cotton triangle on a nail. (Acetone will melt plastic so that is why a glass jar is important)
4. Place an aluminium foil square under your finger.
5. Wrap up your finger in the aluminium, keeping the cotton triangle on your nail.
6. Continue wrapping all your fingers up carefully, this can be a little fiddly but take your time. Leave nails wrapped up for 20-30mins. Pinch and wiggle your nails whilst they are in the wraps to loosen the polish off your nails.
7. This is what my nails looked like once wraps came off, although it looks like they haven't taken off the shellac with a gentle buffing nail file the rest of the polish comes off very easily. A final wipe of an acetone soaked cotton round and any remnants of blue shellac is gone.
8. TAADAA! Shellac free nails! 

Please comment down below if you are a fellow polish picker and if you attempt my at home DIY Gel or Shellac removal!

xxx Nella
Twitter @beautegazette
Instagram @beautegazette
Google +  +Nella van veenendaal 
Bloglovin' HERE
TUMBLR HERE

Wednesday, 20 November 2013

MAKEUP MAGIC : How to fix a smashed powder compact.

Have you ever smashed your favourite powder? This happened to my holy grail highlighter last week. Poor Becca Pressed Shimmering Skin Perfector in Opal, I was totally devastated. But not to worry, here is a simple DIY remedy to fix even the most smashed up of powders.


1. Smash one of your favourite powders.... Not on purpose.

2. Using a knife carefully break up the powder even more using a gentle squashing motions until the powder is finely chopped up.

3. This is the powder consistency you are looking for.

4. Add 3/4 of a teaspoon of rubbing alcohol to the powder.

5. Mix mix mix and blend until the powder turns into a cream, scrape and mould the cream into the shape of your compact.

6. Clean up the edges of your compact with a cotton bud and makeup wipes. Leave in a cool dry place for 2 days until dry.

Voila! Your powder is ready to go once again!


xxx Nella

Twitter @beautegazette
Google +  +Nella van veenendaal 
Bloglovin' HERE
TUMBLR HERE


Tuesday, 23 October 2012

Natural DIY Face Mask


Face masks are fantastic, they boost your regular skin routine and lift your skin if you are feeling run down. Usually I like my Dermalogica Hydration mask but it has sadly come to an end and I am on a saving kick at the moment so I did some research into DIY face masks using things you would have in your kitchen, here is what I concocted.
Pumpkin:
Pumpkin is excellent for use on all skin types, but especially if your skin is damaged from environmental conditions such as overexposure to the sun. Pumpkin is rich in vitamin A, which soothes and softens your skin, and vitamin C, an antioxidant that can help to remedy damage produced by free radicals.
Oats:
Oats are also an amazing natural beauty enhancer. They soothe and heal the skin, while reducing inflammation.
Honey:
Honey has humectant qualities; as a result, it can be used as a moisturiser in many cosmetic preparations. It not only attracts water but also retains it in the skin, so the skin remains supple and elastic. It also protects against wrinkles and dryness.
Milk:
Milk contain lactic acid, Lactic acid is a type of alpha hydroxy acids (AHA). The AHA family is comprised of various ingredients derived from sugar cane, fruit and milk. As the name suggests, lactic acid can be derived from milk, after a steady process of fermentation. Lactic acid is a powerful exfoliant and is featured in many skin care products.

Making your Mask:
Step One: Steam 1/2 cup of pumpkin and allow to cool, once cool mash your pumpkin till smooth with a fork.

Step Two:  Add a table spoon of rolled oats.

Step Three:  Add a teaspoon of Honey.

Step Four:  Add a table spoon of full cream milk and mix all together. Ta-da! A natural pumpkin face mask which will leave you glowing.
When applying the face mask rub the mixture into your skin in gentle circular motions rubbing the oats into your skin. Leave mask on for 15-20mins, it will settle onto your skin and become less runny. When  rinsing off the mask use rubbing circular motions giving your face a massage at the same time. After drying your face your skin will be super soft.


It also looks like you have vomit on your face, but I will do anything to have perfect skin.

Monday, 15 October 2012

Gelish Soak Off Gel Colour : How to DIY and Review


You will need:

- Nail trimmer 
- Nail file
- Cotton wipes
- Gelish Mini Basix Kit $39.95 which contains PH Bond, Foundation, Top it Off and Nourish - which are the curing base and top coats, it also contains a mini Gelish Cleanser and mini Gelish artificial nail remover.
- A Gelish mini Gel colour $19.95 each 
- Gelish Mini Pro LED Curing Light $59.95

Gelish products are available from Hairhouse Warehouse www.hairhousewarehouse.com.au


D.I.Y:

Preparation:
Your nails need to be fully prepped, take your time and push back your cuticles and then buff, file and shape.

Tips:
- Wash your hands with an anit-bacterial soap prior to starting your Gelish mani at home, just to kill any nasty germs lurking about.
- Do one hand from step 1-6 at a time, it is just easier so your not fiddling around with sticky nails.
- Always remove with the method specified (I will do another post on this!) Do not peel off gel or shellac polish, it will ruin your nails and make them very weak and horrible.
- In between each layer your nails will be tacky and sticky, so don't go cooking dinner or going to the toilet.

Step 1.
Apply the PH Bond to your nails, this takes any oil off your nails so the Gelish products have a clean base to adhese too. This is the only step which you do not need to cure with the LED light.

Step 2.
Apply a thin and even layer of Gelish Foundation which is basically a base coat. 

Step 3.
Using the LED Light cure the Gelish Foundation layer, I do my four fingers first and then my thumb second - 45 seconds for each. It is just more comfortable than trying to shove your whole hand in at once. The LED lamp automatically switches off after 45 seconds, to let you know to start the next step.
TIP: When your nails are under the LED LAMP keep your fingers very still and flat as the lamp will heat the polish and it can have some movement and slip around making it uneven if you are wiggling about.

Step 4.
Apply your Gelish colour, making sure you are painting thin and even layers. This will help your nails look neat and not lumpy.It is better to do more thin layers than fewer thick layers. Gelish colours are all different some need 2 coats some need 3, cure with the LED light in between each layer.

Step 5.
Apply a very very thin layer of Gelish Top it off all over your nails, making sure you cover the whole nail and cure under the LED light If you don't cover the entire nail - or where ever the colour is it won't cure and will rub off.

Step 6.
Put a little bit of the Nail cleanser on a cotton wipe and rub and clean your nails and TA-DA! Your nails are dry and ready to go - no waiting around waving your hands in the air waiting for hours till your polish dries.


Gelish Soak off Gel Colour in 'Silver Sand'

REVIEW:

I had the opportunity to test out the Gelish range prior to launch, and I love this product. It is fantastic for busy people who don't have time to wait around for nail polish to dry for hours. The main difference is that Gelish have 72 colours to choose from! That is more than most regular nail polish lines and by far the biggest range of at home gel or shellac colours available. Like all polish ranges there are amazing colours and there are dud colours, my advice would be to do a google image search of the colour on someones nails before buying it just to make sure you like it.
Although the initial outlay of $39.95 + $59.95 + $29.95 may seem like a lot of money, if you have a Gel Mani at a salon prices vary between $50-$70 so after buying the kit and using it 2 times at home you have already saved money rather than if you were getting it done at a salon.
Gelish claims to last up to 3 weeks on the nail, but that depends on if your nails grow super fast or not - I personally have left my Gelish mani on up to 10 days and then I need to take it off because my nail it has grown out too far. Gelish will definately not chip, but if you are a picker try not to peel them off this will really damage your nail. The removal method suggested by Gelish leave your natural nail un-harmed.
I'm slowly building my gelish collection so far I have 'Up in the blue' which is a cool powder blueish-lilac, 'Silver Sand' an irredescent silver glitter with large and small speckles and a clear base and 'Sheer Simple' a beautiful pink based nude - all of which I LOVE! 

Monday, 8 October 2012

DIY Watermelon nails

Watermelon nails have been the most requested of all our designs, they are really cute and scream summertime. Here is the very requested DIY Watermelon Nails guide.

1. Apply a base coat of your favorite red or pink either will do , a fast drying polish is best as you are going to be applying more layers. *Tip: sometimes I do the base coat the night before* Once base is dry, section off the tip of your nail with a white nail art pen - these are really easy to use and help a lot if your not confidant doing a line freehand with a brush. If you have short nails, don't worry just make an imaginary tip approx 2mm from the end of the nail.

2. Using a green nail polish on a very small paint brush, the ones I use are from an art supplies store so it doesn't have to be a special. Fill in the tip sectioned off buy the white line. 

3. To create the seeds of the watermelon take a nail pen and carefully draw little strokes in a cute formation.

4. Wait at lease 30-40mins to dry and then apply your favorite topcoat.  Topcoat will glamorise even the dodgiest nail art. TRUST ME. Applying a topcoat is the equivalent of flattening an image in Photoshop it just makes everything look pretty and shiny.

TA-DA! How easy was that! Can you believe it?

Please let me know if you have any other nail art design requests?  Either pop a comment down below or email beautegazette@gmail.com or on the Beauté Gazette Facebook page HERE!

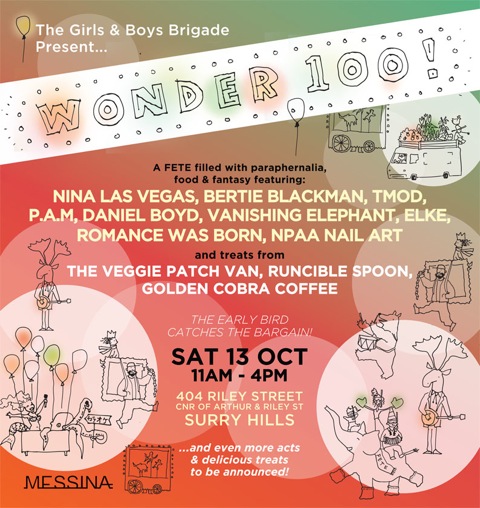
Also if you LOVE this nail tutorial and live in Sydney please come on down the the WONDER 100 Fete this weekend I will be there with nail club NPAA doing amazing mani's! All of the money we make will be going to The Boys and Girls Brigade which run very cool programs for kids and young people helping them make positive life decisions.
HOPE TO SEE YOU THERE!


Sunday, 22 July 2012

DIY : Cucumber Eye Pads

Sundays are my at home beauty night, please dont pop over for a cup of tea because you will find me when a face mask on with my hair wrapped up in glad wrap doing an intense hair treatment.
There cucumber pads are quick DIY remedy for puffy eyes:


1. Roughly peel and chop 2 fresh cucumbers

2. Blend cucumbers into a watery pulp, add a teaspoon of your favorite cleansing water. This makes the mixture smell lovely.

3. Soak some cotton pads in the cucumber mixture -  N.B count out your pads before you soak them so you are doing an even number....because you have ummmmm 2 eyes. DUH!

4. When your cotton pads are soaked through, hold above and let any excess fall off. Then place cucumber soak pads flat, not over lapping in a small sandwich bag - 2 per bag.

5. Place your incredibly weird looking cucumber eye pads into the freezer. When you need to use them, take them out of the sandwich bag and let sit for a minute or two so they aren't 'too cold'. 

* Also please let anyone you live with what the weird bags of gooey green things are in your freezer.

Natural benefits of cucumbers for your eyes is totally mind blowing, Cucumbers reduces the appearance of dark circles! You heard me right, its the natural antioxidants and silica within cucumbers which helps reduce those bloody dark circles.

Bit of a booze hound? Need a little help with puffy eyes? Cucumbers reduce swelling because of the high amounts of ascorbic acids contained in them.


Thursday, 12 July 2012

DIY : Egyptian Lover Nails


My friend Alyssa came over for a hang out yesterday and naturally we did our nails, she wanted evil eyes like Alexa Chung the hipster nail art reigning heavy weight queen. Could I ever! 

1. After applying a base coat and letting it dry completely. Draw almond shapes on your nails with a white nail pen. Let dry.

2. Are you a brown eyed girl? Or blue eyed beauty? Using a super dooper fine brush paint a small circle in the center of the almond shape as the pupils. Let Dry.

3. Outline the almond shape with a black nail pen.

4. Now its starting to look a little creepy. Draw a dot in the center of the pupil with the black nail pen - press very lightly because the polish underneath wont be completely dry.

5. OMG EYELASHES! 

TA-DA!


Related Posts Plugin for WordPress, Blogger...