

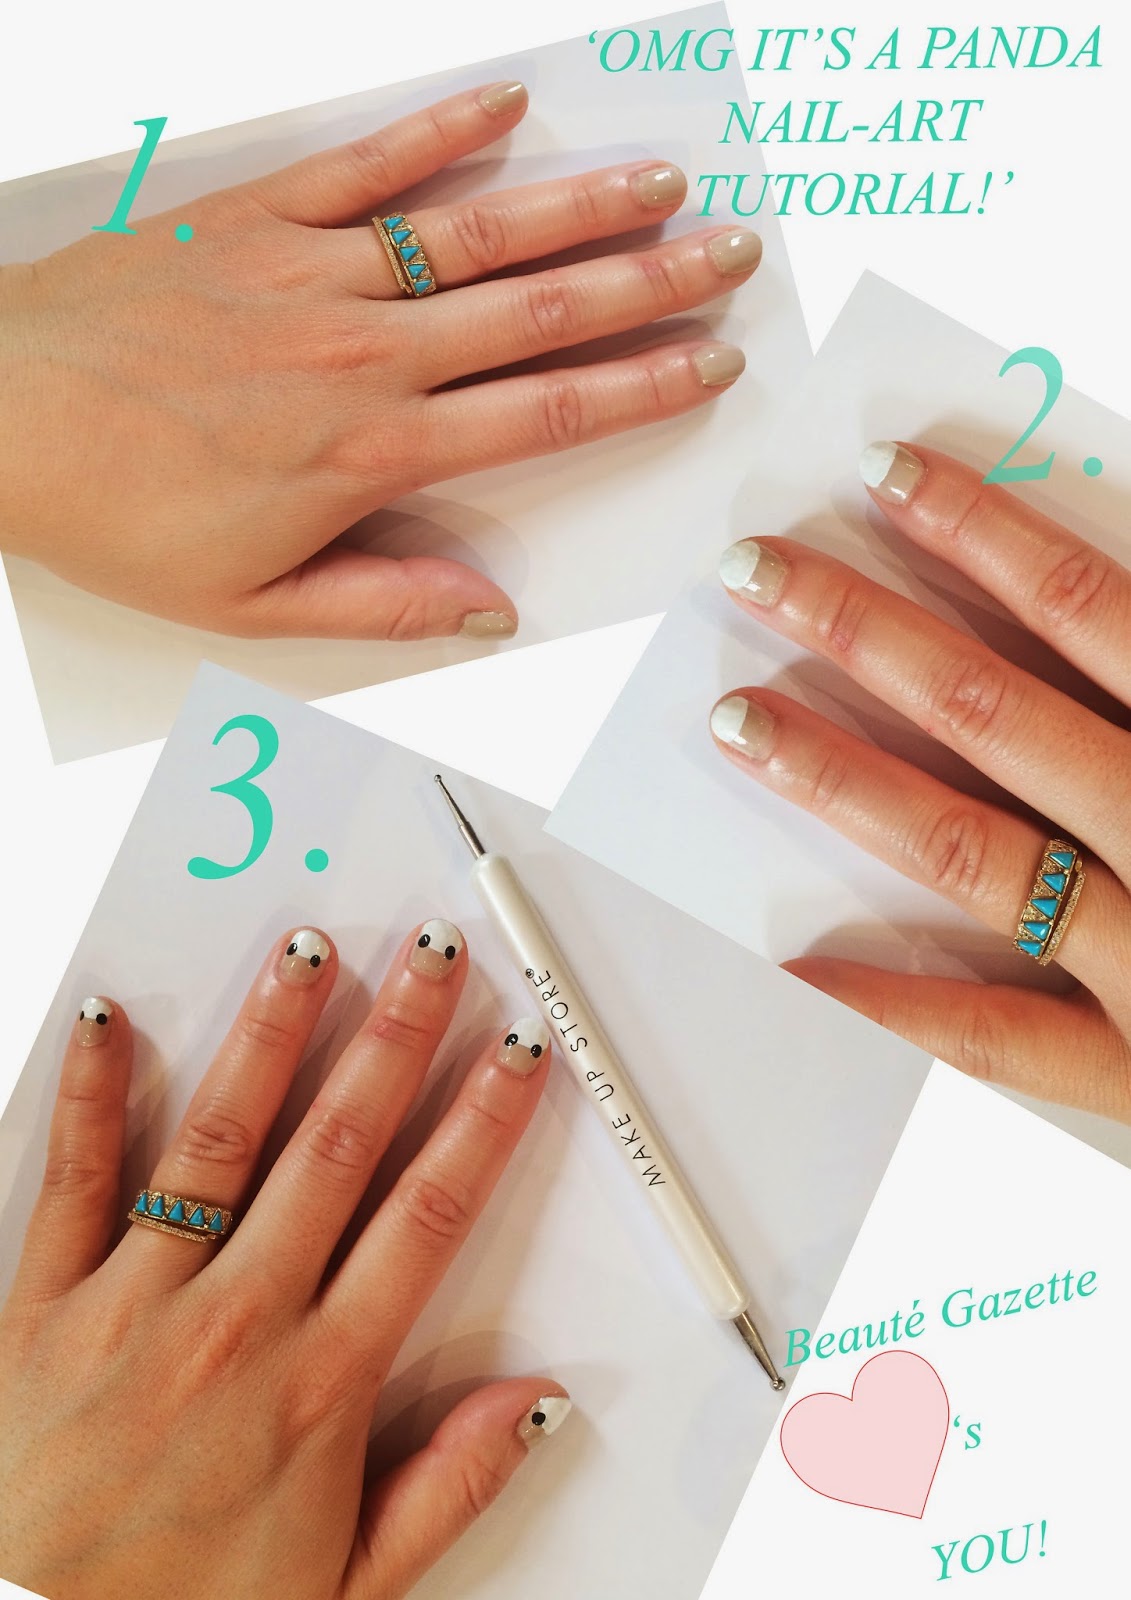
1. Give your nails a good tidy up - trim your cuticles, buff and shape your nails into a rounded tip with a nail file. Then apply a base, you could use a clear polish but I prefer a nude to really make the panda pop! I used Essie St Tropez
2. It's time to give your panda a head, for this you are going to need a white polish for the tutorial I used Rimmel Britt Manicure in Porcelin. Using the brush carefully paint a semi circle to about half way down the nail, just like in the image above. It my take two coats to become totally opaque. Then let dry for 15mins, making sure these coats are completely dry will make the next steps easier.
3. To create the ears, eyes and nose you will need to use a dotting tool with a fine end and a large end, I love this one from Make Up Store it has the perfect sized baubles to create millions of unique and totally cute nail designs. You will need a black polish for the ears, eyes and nose I used Rimmels 60's Nail polish in Black Out, pour out a tiny amount out onto a scrap piece of paper and dip the large end of the dotting tool into the black polish. Lightly dot on the ears to the top of the white semi circle. If you are unsure of how much polish will come off the dotting tool, practice dotting on the scrap paper first.

4. Now its time for the nose......omg its so cute. Dot the center of your nails at the very tip.
5. Almost done...Told you it was easy. For the eyes do two dots in the center of the semi circle and allow them to dry. Then Tipping a teensey-weensey amount of white paint onto your scrap paper and using the small end of the dotting tool do a very tiny white dot in the middle of your black dots which are the eyes. ALLOW TO DRY....and I mean really dry, give it a good 30mins before you apply a top coat. Otherwise the design will run when you apply a topcoat and your panda will be crying. Apply your favourite topcoat and enjoy having the cutest panda nails in the world!


